Hands-on TapisUI Tutorial
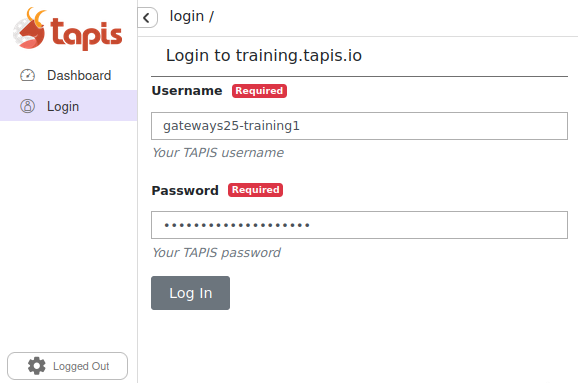
Login to https://training.tapis.io. Use the username and password provided to you to authenticate.
Registering Tapis Systems
In this tutorial, we will create two Tapis systems: one for running jobs on a VM host using FORK, and another for running jobs on an HPC-type host using BATCH.
⚠️ Note: While it is possible to include login credentials in the system definitions, we have not done so here. Well-crafted system definitions are often copied and reused. For security reasons, it is recommended to register login credentials separately.
When you log in to TapisUI, you may see My Systems showing “0”, as no systems have been created yet. As you create systems, this list will populate accordingly. Depending on the tenant you might see some “public” systems available for authentication.
Create Tapis System with TapisUI
Click on Systems from the left-hand menu, then click the Create System button in the top-right corner. You will see two options for creating a system:
- FORM: provides a guided form with validation
- JSON Editor: provides an open-ended request body with validation
For this tutorial, we will use the JSON Editor in order to utilize copy-paste from snippets provided here.
⚠️ Note: All System and Application IDs must be unique. To satisfy this during the tutorial we ask that users replace UNIQUEID in JSON with their user ID.
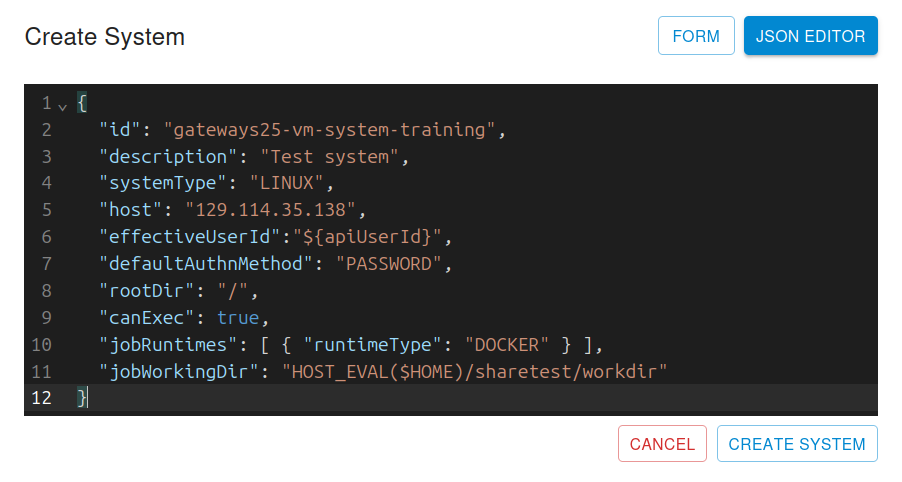
Copy the system JSON provided below into the editor, then click Create System:
{
  "id": "gateways25-vm-system-trainingUNIQUEID",
  "description": "Test system",
  "systemType": "LINUX",
  "host": "129.114.35.138",
  "effectiveUserId":"${apiUserId}",
  "defaultAuthnMethod": "PASSWORD",
  "rootDir": "/",
  "canExec": true,
  "jobRuntimes": [ { "runtimeType": "DOCKER" } ],
  "jobWorkingDir": "HOST_EVAL($HOME)/sharetest/workdir"
}
This is an example of using the UI to create a system:
Following “Create System” you should now see the system you created in My Systems.
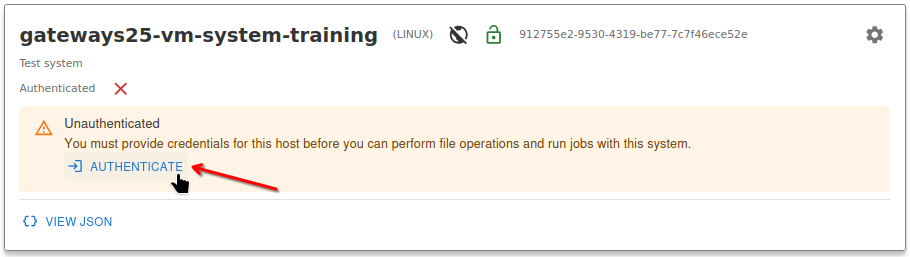
Register Credentials for the VM system
Now that a system is created, you will need to register credentials for your username. These credentials allow Tapis to access the host system on your behalf.
Tapis supports various authentication methods, such as PASSWORD and PKI_KEYS. In this tutorial, we will show you how to add password-based credentials for your system.
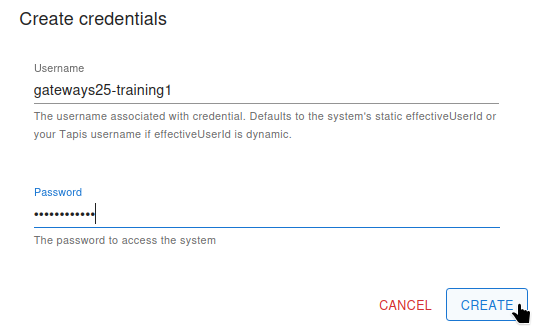
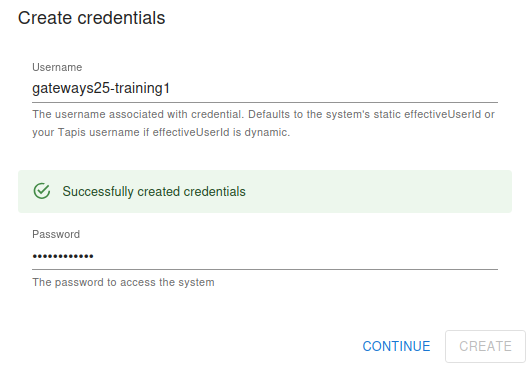
The username and password to use for VM system should be provided to you. The username should be similar to your login username, while the “vm_password” will be unique. When ready, click on “Authenticate” on the VM system created earlier.
Fill the password field with the provided “vm_password” and click “Create”.
Once done, you should see “Successfully created credentials”. If there is any errors please try to enter the vm_password again or reach out for assistance.
Now that you have successfully added your credentials, your system is ready to use.
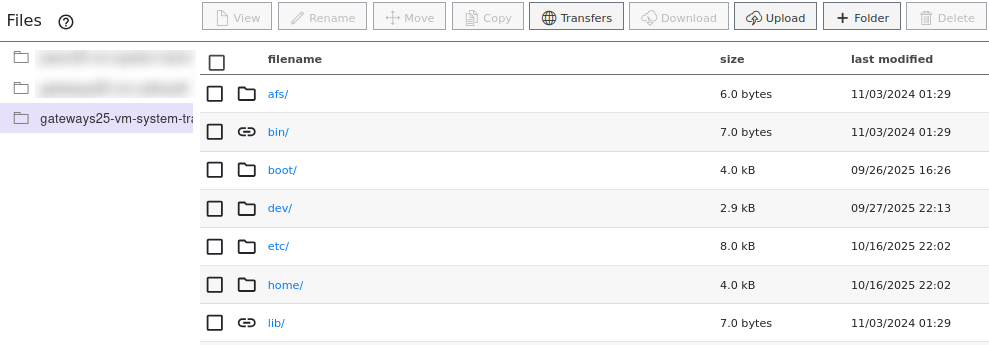
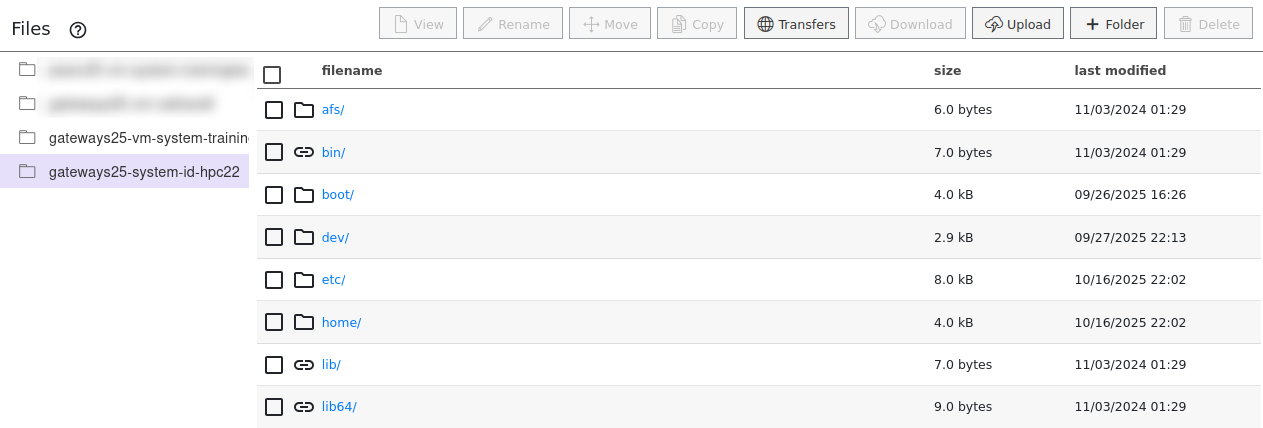
To verify a working system, go to the Files tab from the left-hand menu and try listing the files. This Files action will access the system using the credentials provided and provide a view of files on the system. You should see something similar to the image below.
We will now learn to create a Sentiment Analysis Application with Tapis which will run applications (via jobs) on the newly created System.
Natural Language Processing: Sentiment Analysis
- Sentiment Analysis is one of the most popular applications of Natural Language Processing, which uses the Text Classification method to analyse the sentiment or emotion of the given text.
- Sentiment analysis assigns a label like 🙂 positive, 🙁 negative, or 😐 neutral to a sequence of text.
- It is useful tool to make business decisions based on customer feedback and reviews.
Understanding the Sentiment Analysis Model
This tutorial uses the Hugging Face transformers library for sentiment analysis. Here’s a quick example of how the model works (installed with “pip install -q transformers”):
from transformers import pipeline

sentiment_pipeline = pipeline("sentiment-analysis")

text = "Glad to see you at Gateways 25"
sentiment_pipeline(text)
This would return a result indicating positive sentiment with a confidence score, akin to the following:
SENTENCE,anger,disgust,fear,joy,neutral,sadness,surprise
Glad to see you at Gateways 25,0.001,0.001,0.000,0.972,0.011,0.004,0.011
Create Tapis App with TapisUI
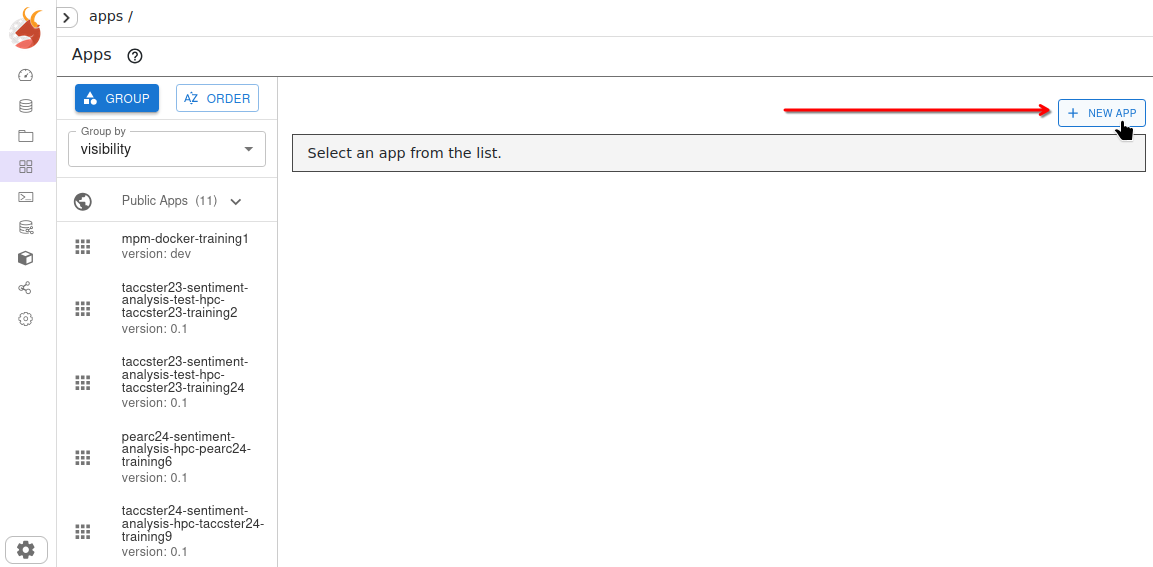
We’ll be creating an App with TapisUI now. Create an app by navigating to the Apps Tab in TapisUI and click on “+ New App” at the top right.
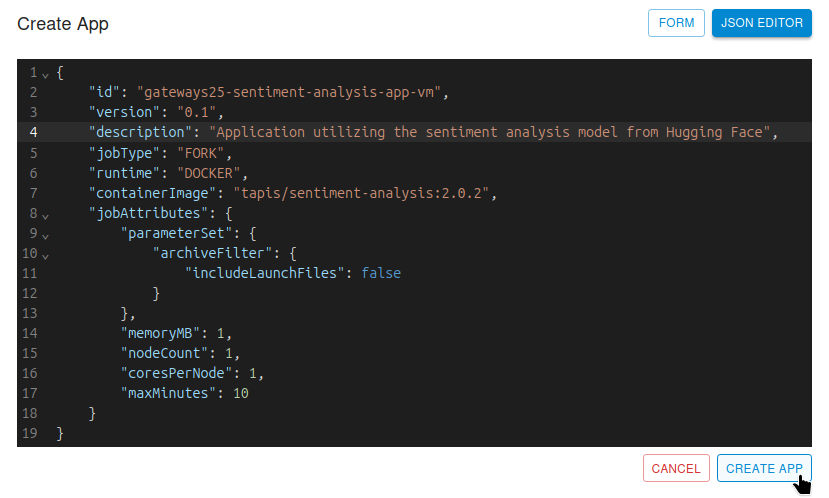
Once we have the app creation modal, we want to switch to “JSON Editor” and paste in the following app definition described in JSON:
{
    "id": "gateways25-sentiment-analysis-app-vmUNIQUEID",
    "version": "0.1",
    "description": "Application utilizing the sentiment analysis model from Hugging Face",
    "jobType": "FORK",
    "runtime": "DOCKER",
    "containerImage": "tapis/sentiment-analysis:2.0.2",
    "jobAttributes": {
        "parameterSet": {
            "archiveFilter": {
                "includeLaunchFiles": false
            }
        },
        "memoryMB": 1,
        "nodeCount": 1,
        "coresPerNode": 1,
        "maxMinutes": 10
    }
}
This is example of using the UI to create the app:
Click on Create App and it should give a success message. We will now submit a Job for our newly created application
Submit Job in TapisUI
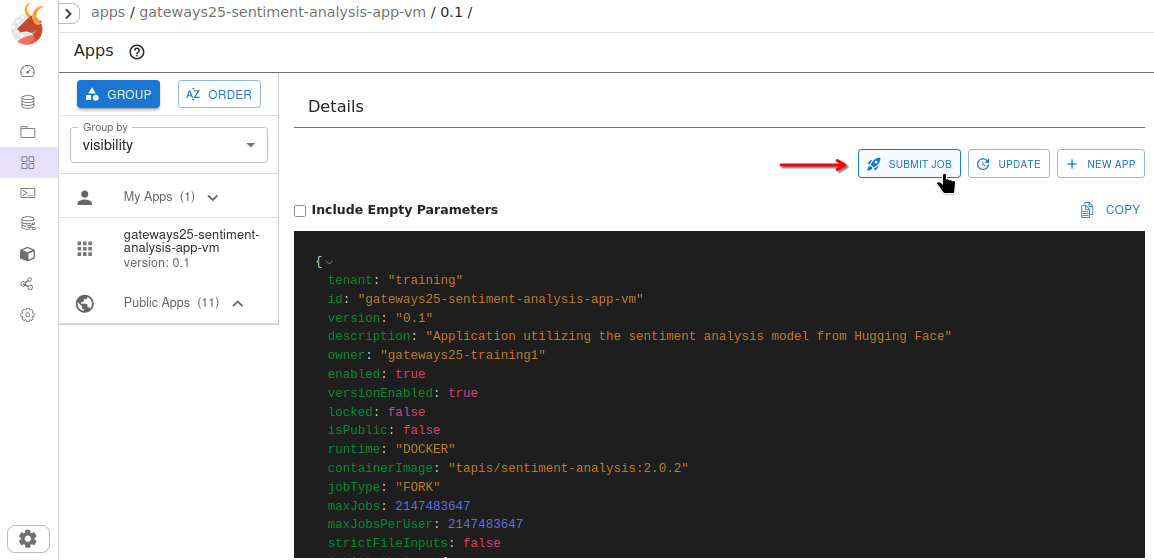
We should now have a created App when we navigate to the Apps tab and view “My Apps”. Click and select the Application you created. Click the “Submit Job” button associated with your app, as shown here:
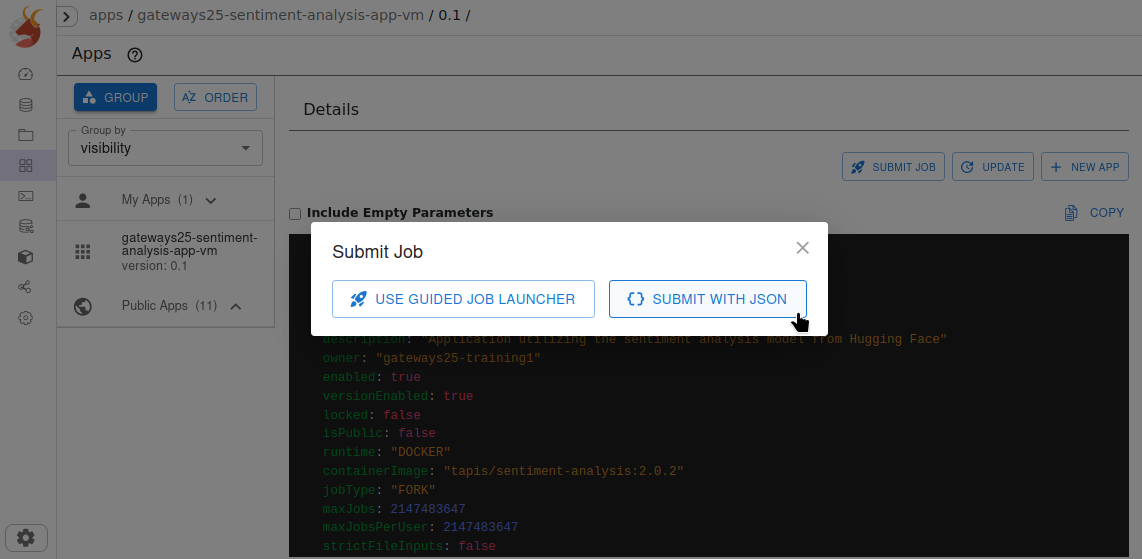
You’ll be prompted to use a Guided Job Launcher or JSON Editor, we’ll be using JSON Editor:
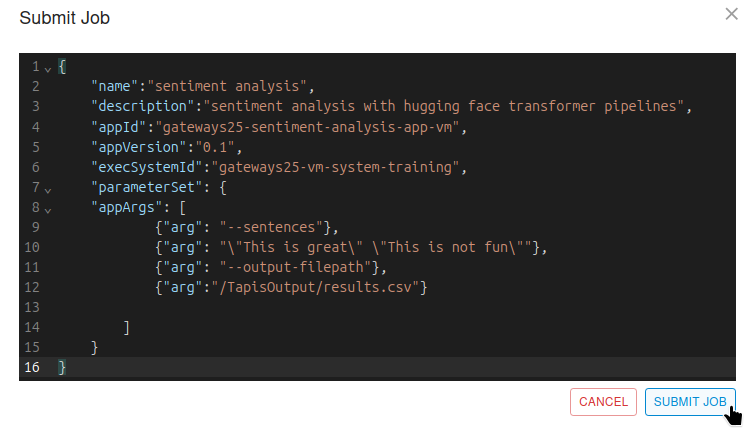
Once the “Submit Job” modal appears, copy and paste the following Job JSON into “JSON Editor” and click “Submit Job”.
{
    "name":"sentiment analysis",
    "description":"sentiment analysis with hugging face transformer pipelines",
    "appId":"gateways25-sentiment-analysis-app-vmUNIQUEID",
    "appVersion":"0.1",
    "execSystemId":"gateways25-vm-system-trainingUNIQUEID",
    "parameterSet": {
    "appArgs": [
            {"arg": "--sentences"},
            {"arg": "\"This is great\" \"This is not fun\""},
            {"arg": "--output-filepath"},
            {"arg":"/TapisOutput/results.csv"}

        ]
    }
}
This shows the TapisUI view for “Submit Job”:
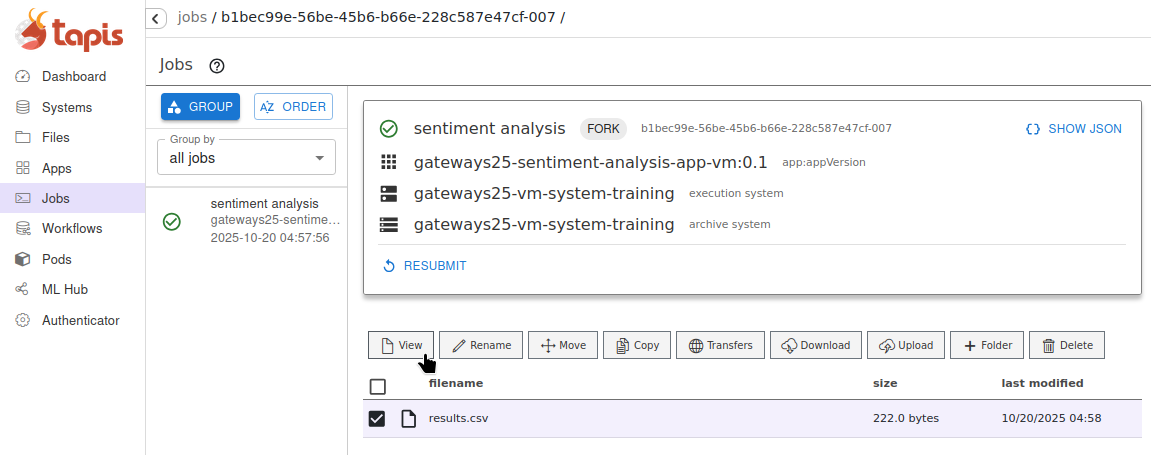
Once the Job is submitted, Tapis will run your specified Application on the specified System with the inputs provided during Job submission. You can view current Job status in the Job tab. The ability to cancel the job is presented at this point.
After a brief wait, the Job successfully finishes. The Job tab once finished should provide a “results.csv” file which has the results from sentiment analysis on the sentences provided in the job. Click on the file and press “View” to view the contents.
The previous input sentences result in something akin to the following:
SENTENCE,anger,disgust,fear,joy,neutral,sadness,surprise,anger,disgust,fear,joy,neutral,sadness,surprise
This is great,0.002,0.003,0.001,0.901,0.071,0.003,0.019
This is not fun,0.032,0.076,0.004,0.003,0.031,0.845,0.008
Running on HPC Systems
Create a system for the HPC cluster
With just a few changes to the system definition you can create a second system that can be used to run the same application on an HPC type host. Note the minimal changes:
- id - A unique id is required
- host - Main hostname for the HPC system.
- rootDir - Using the root directory of the host gives us flexibility in setting jobWorkingDir. Note that you still need LINUX permissions.
- jobWorkingDir - Now determined dynamically using the Tapis v3 function HOST_EVAL()
- jobRuntimes - Most HPC systems support singularity and not docker
- batchLogicalQueue.hpcQueueName - HPC queue to use by default.
- batchLogicalQueues - HPC queue definitions for this HPC system.
In the TapisUI Systems Tab, click on “+ Create System” like before. Copy the below System definition JSON into the JSON Editor and click “Create System”.
{
  "id": "gateways25-system-id-hpcUNIQUEID",
  "description": "System for testing jobs on an HPC type host for Gateways25",
  "systemType": "LINUX",
  "host": "129.114.35.138",
  "defaultAuthnMethod": "PASSWORD",
  "effectiveUserId": "${apiUserId}",
  "rootDir": "/",
  "canExec": true,
  "jobRuntimes": [ { "runtimeType": "SINGULARITY" } ],
  "jobWorkingDir": "HOST_EVAL($HOME)/sharetest/workdir",
  "canRunBatch": true,
  "batchScheduler": "SLURM",
  "batchSchedulerProfile": "tacc",
  "batchDefaultLogicalQueue": "tapisNormal",
  "batchLogicalQueues": [
    {
      "name": "tapisNormal",
      "hpcQueueName": "normal",
      "maxJobs": 50,
      "maxJobsPerUser": 10,
      "minNodeCount": 1,
      "maxNodeCount": 16,
      "minCoresPerNode": 1,
      "maxCoresPerNode": 68,
      "minMemoryMB": 1,
      "maxMemoryMB": 16384,
      "minMinutes": 1,
      "maxMinutes": 60
    }
  ]
}
Once the HPC System is successfully created it should show up in My Systems.
Register Credentials for the HPC system
Now that the System is created you will need to authenticate into it as well. Click “Authorize” and provide the “vm_password” provided to add credentials for the System.
Once you get a message that System credentials were successfully created, you should be able to list files on that System. Go to the Files tab and click on the System ID that was created recently.
Create HPC Application
In order to run a Job on a System you will need to create a Tapis application that can be run on the VM host or the HPC cluster.
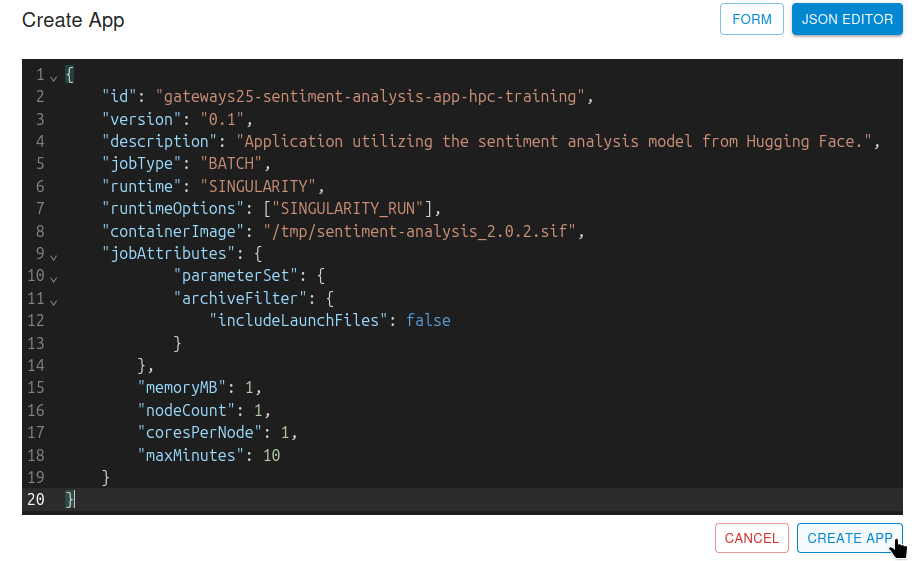
Copy the following App definition JSON into JSON Editor after pressing “+ New App”.
{
    "id": "gateways25-sentiment-analysis-app-hpc-trainingUNIQUEID",
    "version": "0.1",
    "description": "Application utilizing the sentiment analysis model from Hugging Face.",
    "jobType": "BATCH",
    "runtime": "SINGULARITY",
    "runtimeOptions": ["SINGULARITY_RUN"],
    "containerImage": "/tmp/sentiment-analysis_2.0.2.sif",
    "jobAttributes": {
            "parameterSet": {
            "archiveFilter": {
                "includeLaunchFiles": false
            }
        },
        "memoryMB": 1,
        "nodeCount": 1,
        "coresPerNode": 1,
        "maxMinutes": 10
    }
}
This is an example of creating the new System with TapisUI:
Submit Job on HPC
Now that the app is created you can submit a new job with your HPC System and App.
{
    "name":"sentiment analysis hpc",
    "description":"sentiment analysis with hugging face transformer pipelines",
    "appId":"gateways25-sentiment-analysis-app-hpc-trainingUNIQUEID",
    "appVersion":"0.1",
    "execSystemId":"gateways25-system-id-hpcUNIQUEID",
    "parameterSet": {
    "appArgs": [
            {"arg": "--sentences"},
            {"arg": "\"This is great\" \"This is not fun\""},
            {"arg": "--output-filepath"},
            {"arg":"./output/results.csv"}

        ]
    }
}
Setting Notifications on Job Events
Note: Make sure to add your email address in the submitJob call.
{
    "name":"sentiment analysis hpc",
    "description":"sentiment analysis with hugging face transformer pipelines",
    "appId":"gateways25-sentiment-analysis-app-hpc-trainingUNIQUEID",
    "appVersion":"0.1",
    "execSystemId":"gateways25-system-id-hpcUNIQUEID",
    "parameterSet": {
    "appArgs": [
            {"arg": "--sentences"},
            {"arg": "\"This is great\" \"This is not fun\""},
            {"arg": "--output-filepath"},
            {"arg":"./output/results.csv"}

        ]
    },
    "subscriptions":
    [
      {
        "description": "Test subscriptions",
        "eventCategoryFilter": "ALL",
        "deliveryTargets": [ { "deliveryMethod": "EMAIL","deliveryAddress":"***"}]
      }
    ]
}
Cancel/Resubmit a Job
You may cancel a job if it is not in the terminating state by clicking the “Cancel Job” button in TapisUI. Similarly you can resubmit a job by clicking the “Resubmit” button from the Job tab and selection.
System Share/Unshare
Systems can be shared or unshared with other users from TapisUI. Navigate to the Systems Tab and click the settings cog after selecting system to view more options. Here a use can update a system, manage permissions, share, change owners, and make a System public.