Section 2: Initial Steps with TapisUI
Step 2.1: Logging In
Login to https://public.tapis.io. Visit the site and press the “Proceed to login” area.
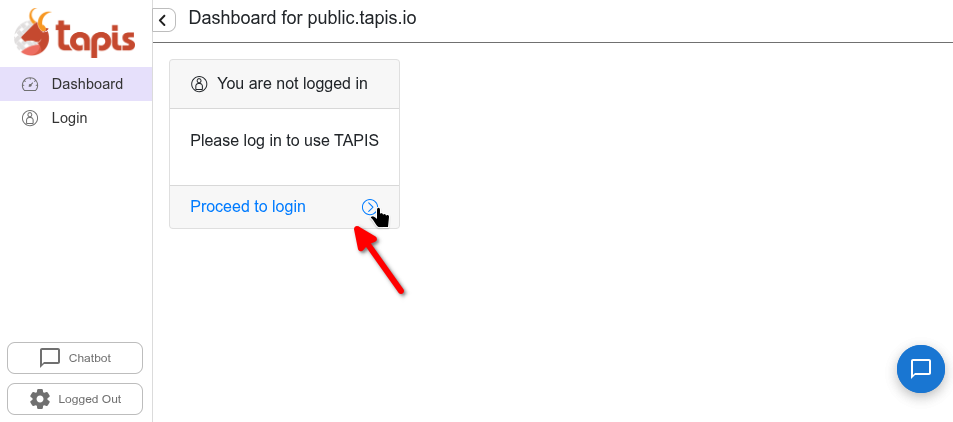
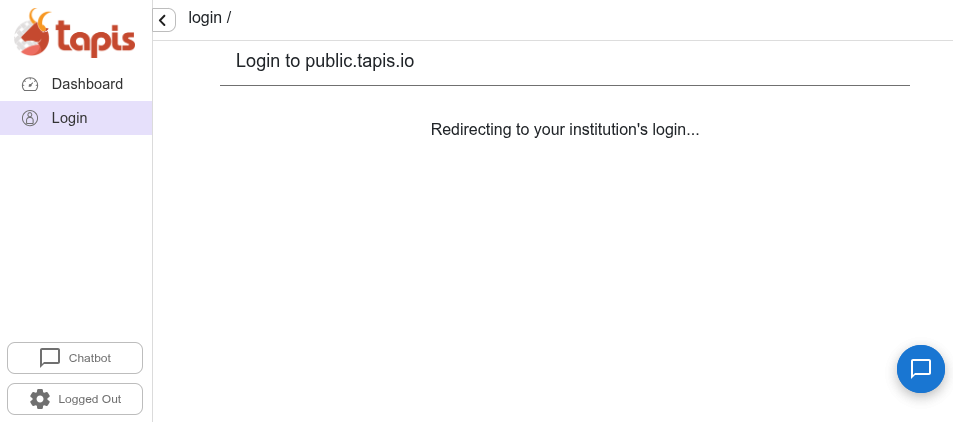
Once you click, you will be redirected to your institute’s authentication.
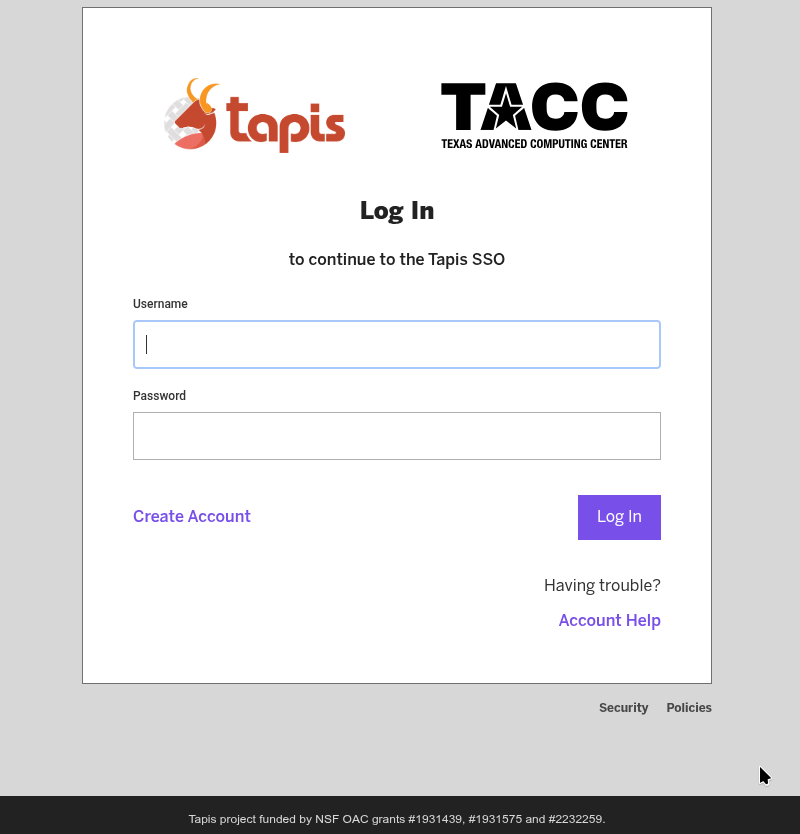
You will then be prompted to log-in with username, password, and MFA token.
Step 2.2: Inspect JWT
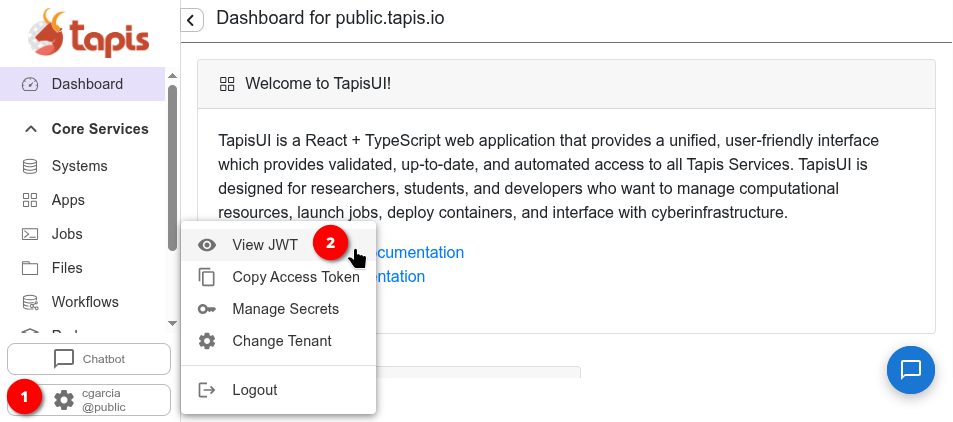
Once logged in, you can inspect your JSON Web Token (JWT). The JWT is the authentication token that Tapis uses to verify your identity across all API calls. It contains encoded claims about your user session — including your username, tenant, and token expiration. Press your username at the bottom-left, in the sidebar, and select View JWT to view your token.
Tapis Systems
A Tapis system represents a storage or execution resource — such as a VM or HPC cluster — that is registered with the Tapis platform. Systems can be used to run jobs, stage files, and archive outputs. A single system can serve as both a storage and execution resource and can be shared among users.
In this tutorial, instead of creating systems from scratch, we will use a public system that has been pre-registered for you on TACC’s Vista cluster.
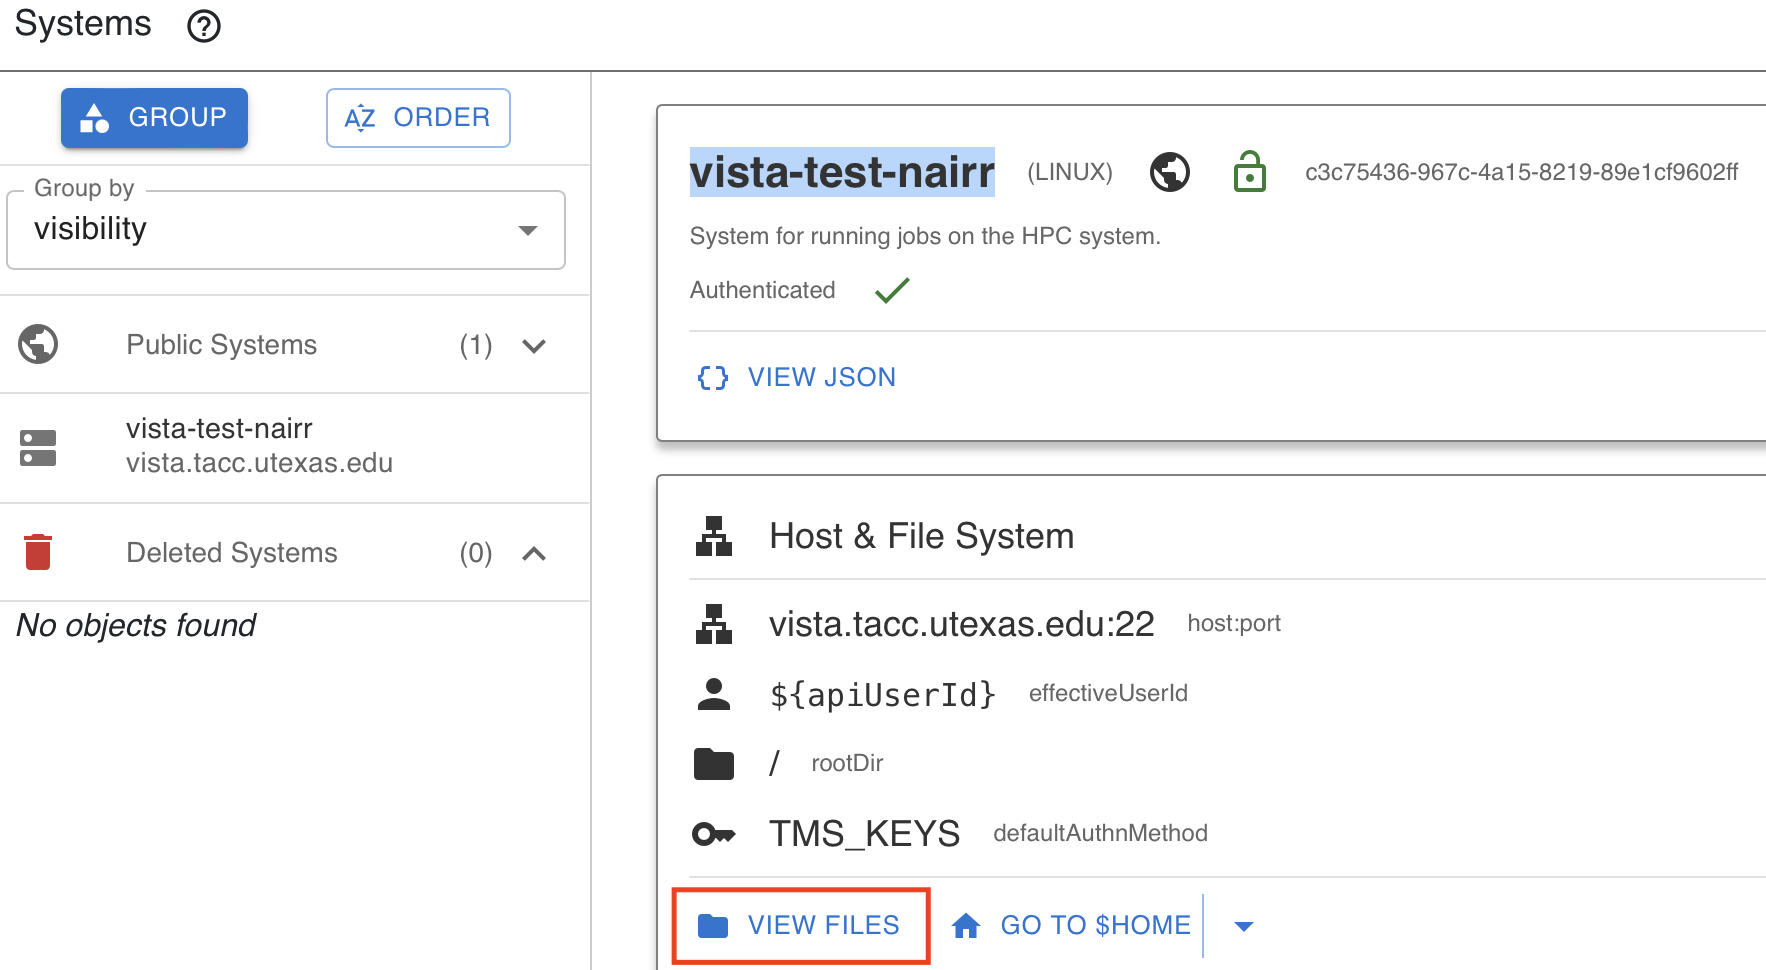
Step 2.3: Navigate the Systems List
When you log in to TapisUI and click on Systems from the left-hand menu, you should see one public system available to you. This system has been pre-registered for the tutorial.
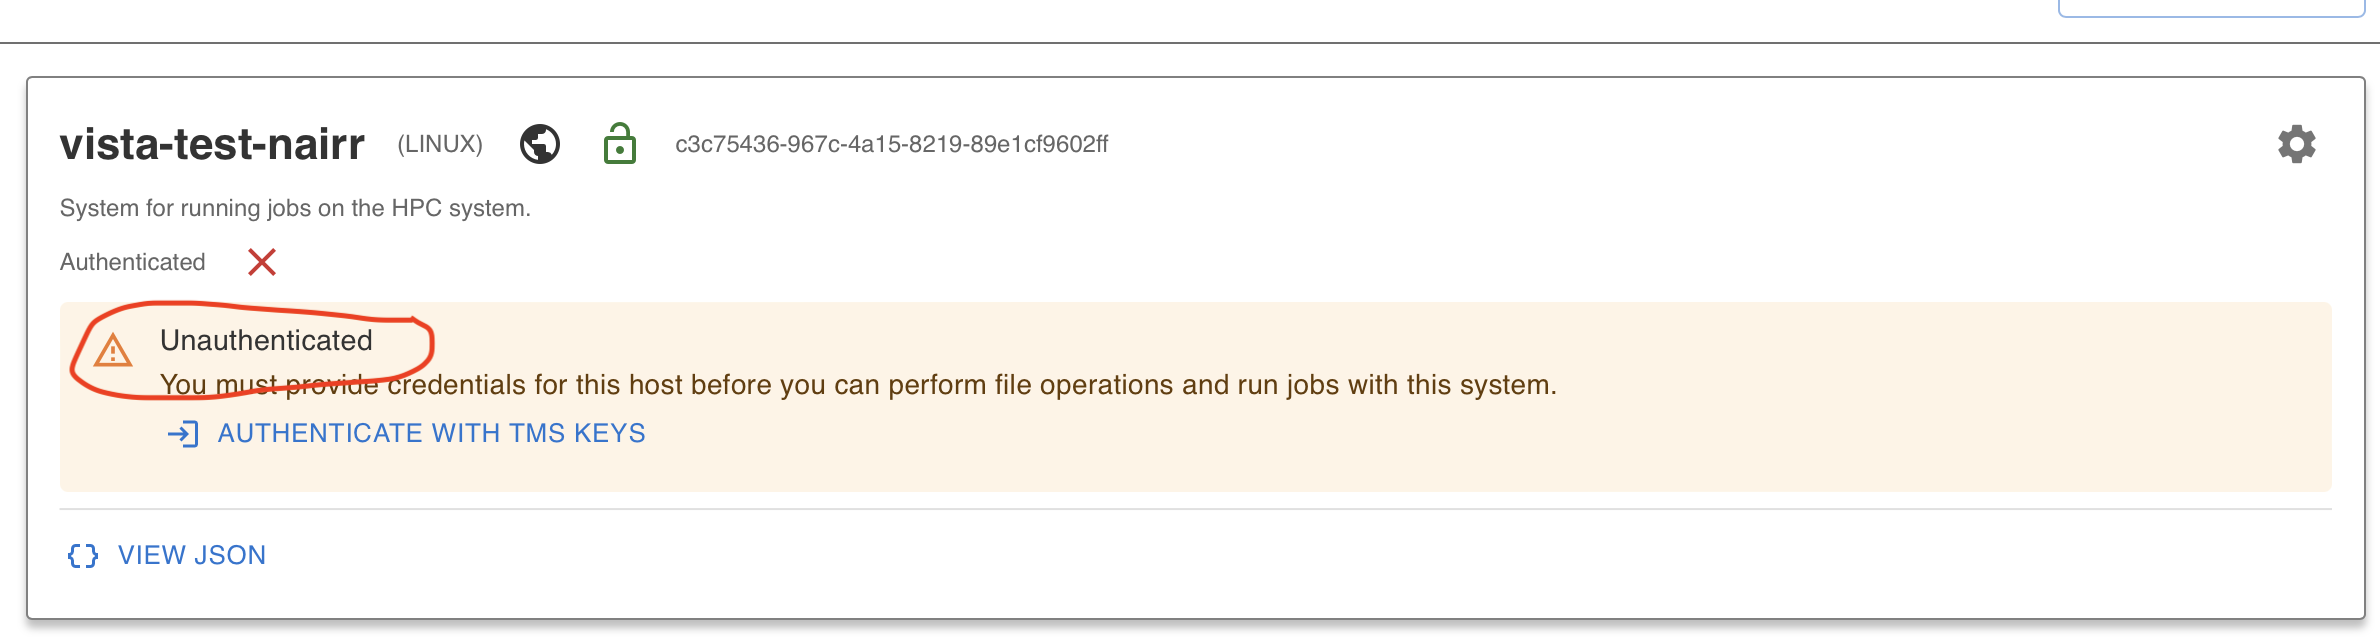
⚠️ Note: The system is visible but you are not yet authenticated to access files or run jobs on it. You must first add TMS credentials.
Step 2.4: Add TMS Credentials for the NAIRR Vista Public System
To access the public system running on Vista, you need to add TMS (Trust Management System) credentials. TMS credentials are temporary credentials generated by the TMS service and stored in the Tapis Security Kernel (SK). They allow Tapis services and applications to securely access external resources on your behalf. Instead of storing permanent usernames or passwords, Tapis retrieves the required credentials from TMS at runtime — improving security by keeping sensitive information encrypted and centrally managed.
Click on Authenticate with TMS Keys on the Vista system.
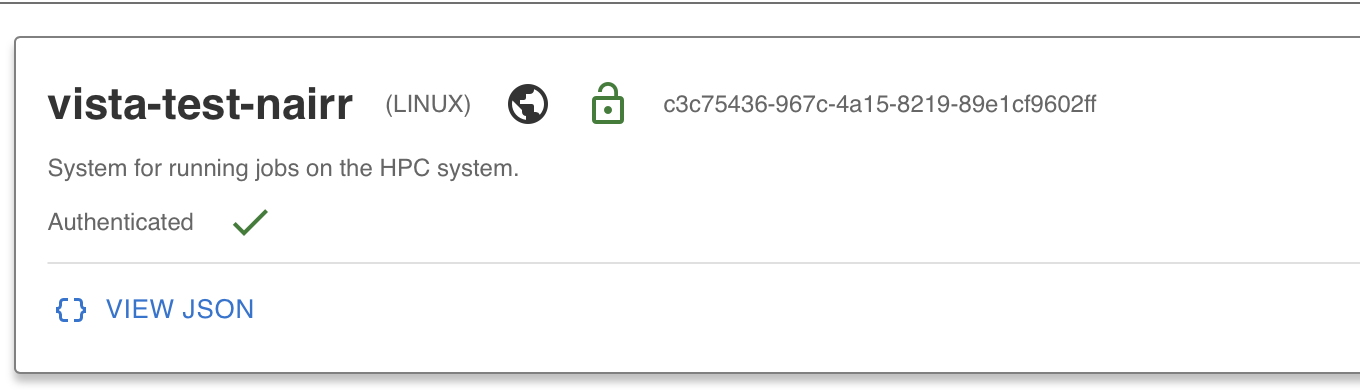
Once your TMS credentials are added, your system is ready to use.
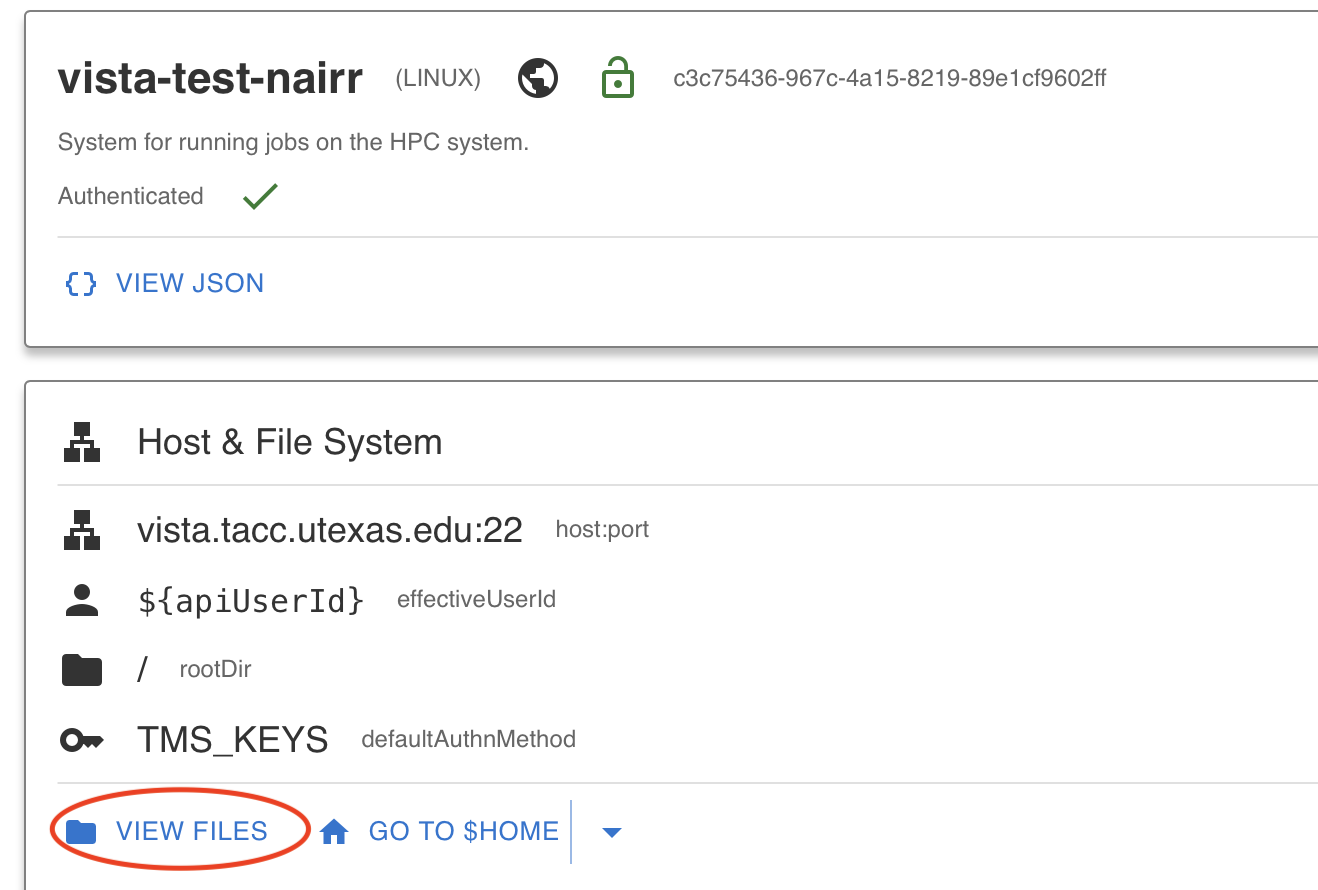
Step 2.5: Use “Go to Home” to Get to Files
After authenticating, you can verify your system access by clicking the View Files button, which will take you to the file listing on the Vista system.
Tapis Files
The Tapis Files service provides a unified interface for managing files across any registered Tapis system. Once you have authenticated to a system, you can browse, upload, download, and manage files directly from TapisUI.
Step 2.6: Navigate the Files in Vista System
From the left-hand menu, click on the Files tab and select the Vista system. You should see a listing of files on the system. You can navigate directories, view file details, and open files directly.
Step 2.7: Test Uploading a File
Try uploading a file to the Vista system using the upload functionality in the Files tab. This confirms that your credentials are working and that you have write access to the system.
Tapis Apps
A Tapis application represents all the information required to run a Tapis job on a Tapis system. Each application is versioned and associated with a specific tenant. Applications can be private (accessible only to the owner) or shared publicly across the tenant.
In this tutorial, instead of creating an application from scratch, we will use the FlexServ public application that has already been registered for you.
Step 2.8: Navigate to the Tapis Apps List
Click on Apps from the left-hand menu in TapisUI. You will see a list of available applications. Toggle between “My Apps” and “Public Apps” to see the full list.
Step 2.9: Find the FlexServ Public App
Look for the application FlexServ-vista-nairr version 1.4.0 in the public apps list. FlexServ is a TACC-owned inference server for running AI models on HPC systems. It has been pre-registered as a public app for all users to submit jobs.
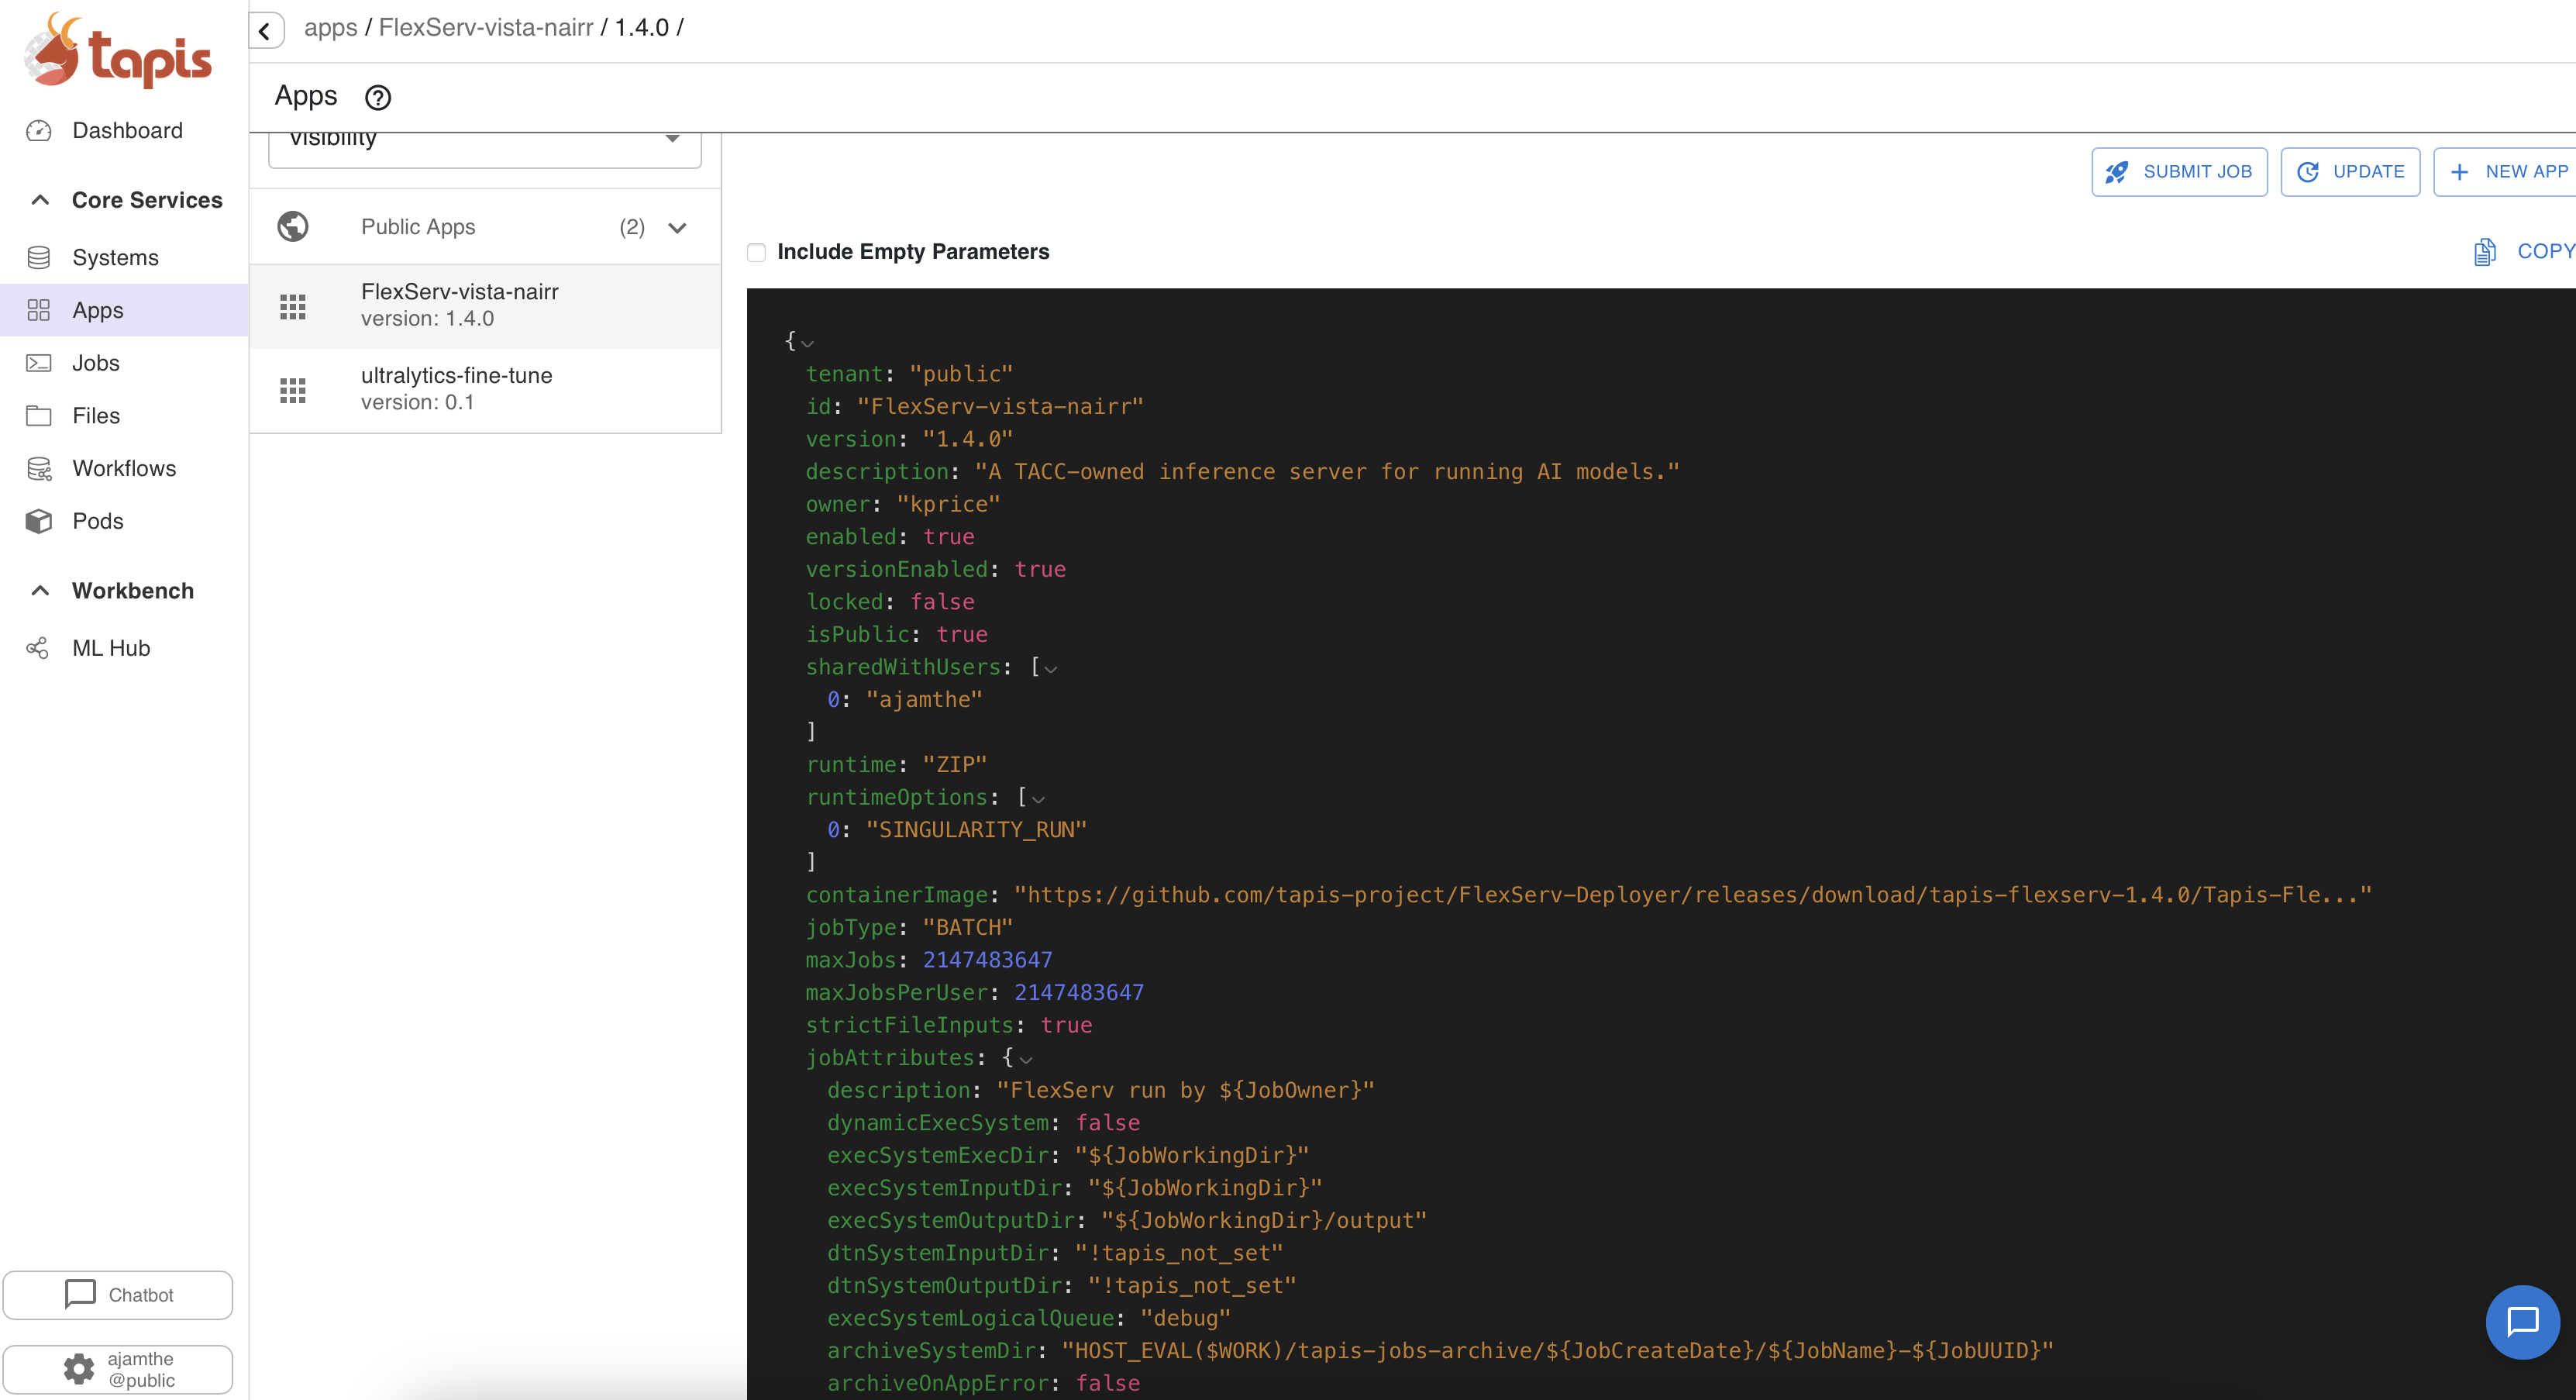
FlexServ supports running various AI models from Hugging Face, provides an OpenAI-compatible API, and includes a built-in UI for chat completion and code generation. We will use it in later sections to run inference jobs and generate code.
Tapis Chatbot
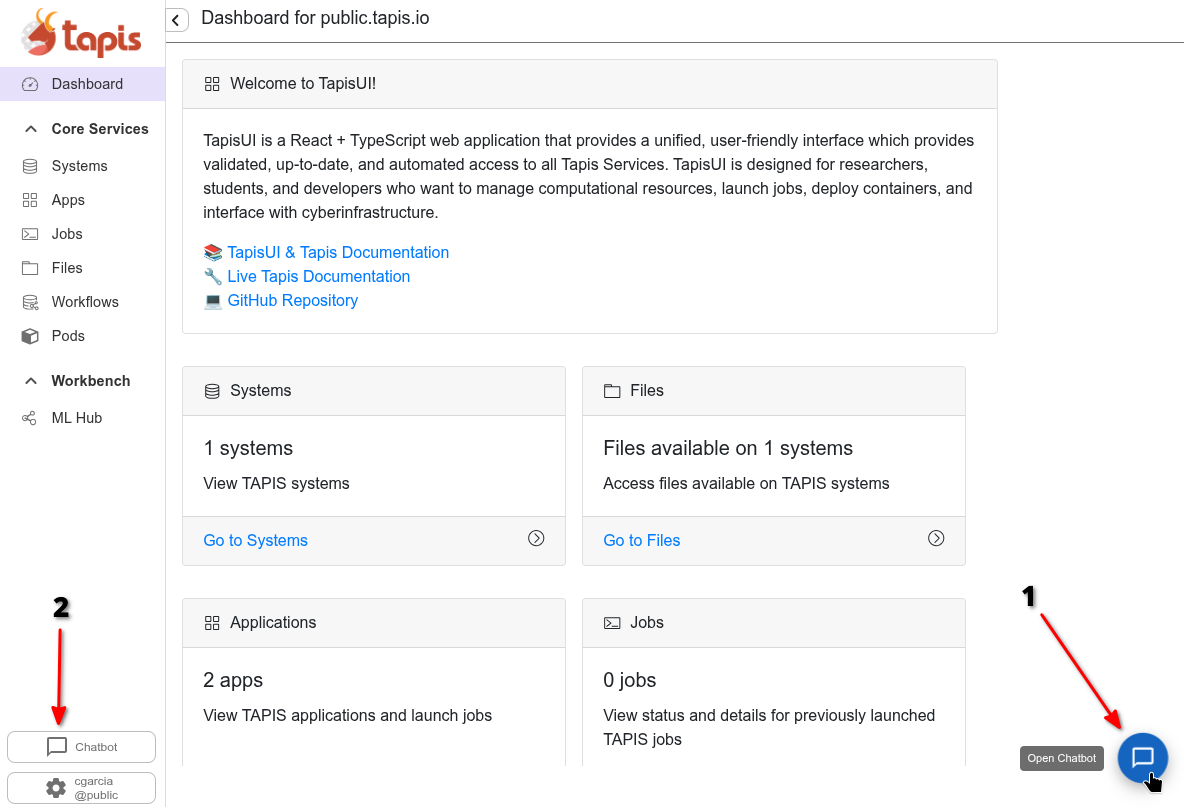
TapisUI includes a built-in Chatbot feature that allows you to interact with AI models directly from the interface. To use the chatbot the user can press the chatbot button in the sidebar near the profile button or press the message bubble at the bottom right.
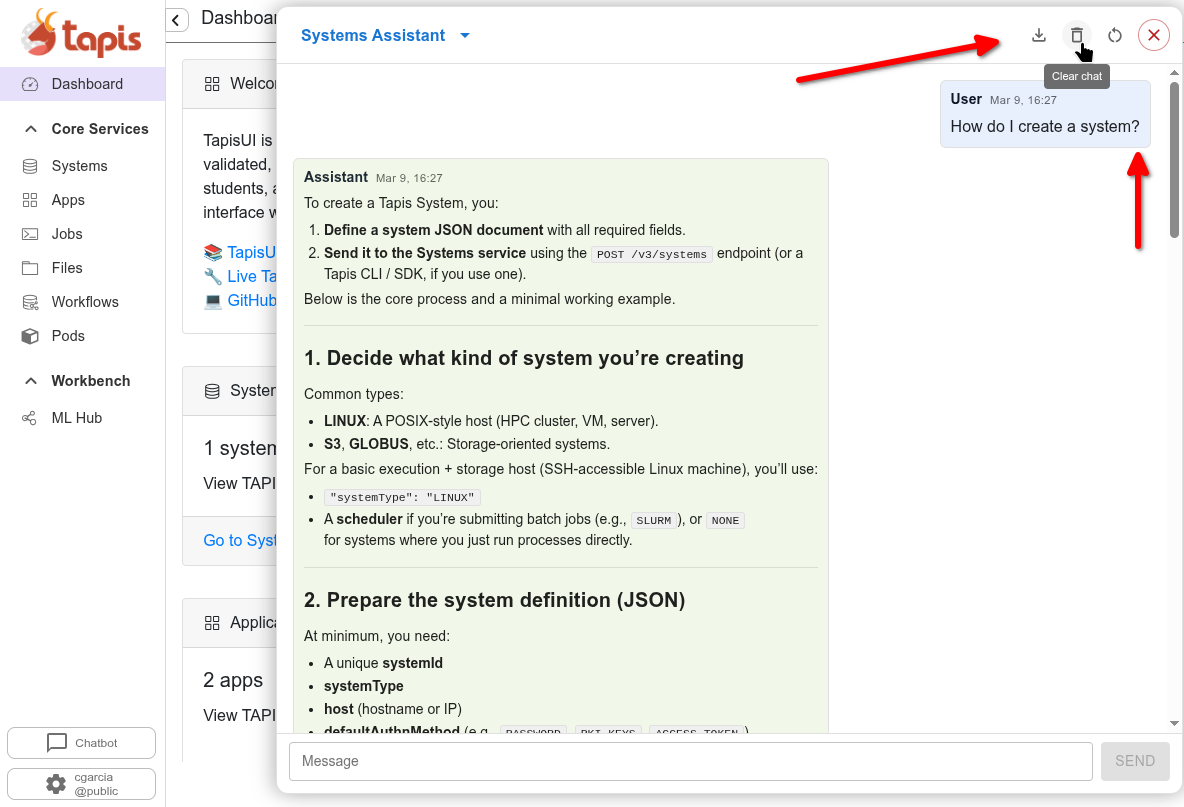
The chatbot window will appear overtop the page you’re currently on. In this window you’ll notice operations for clearing history, reseting size, changing agent, and exporting chat in the top bar. Each assistant in the assistants selection consists of a configurable backend model and prompt. Each assistant has some boilerplate example prompts and description in the initial chat window.
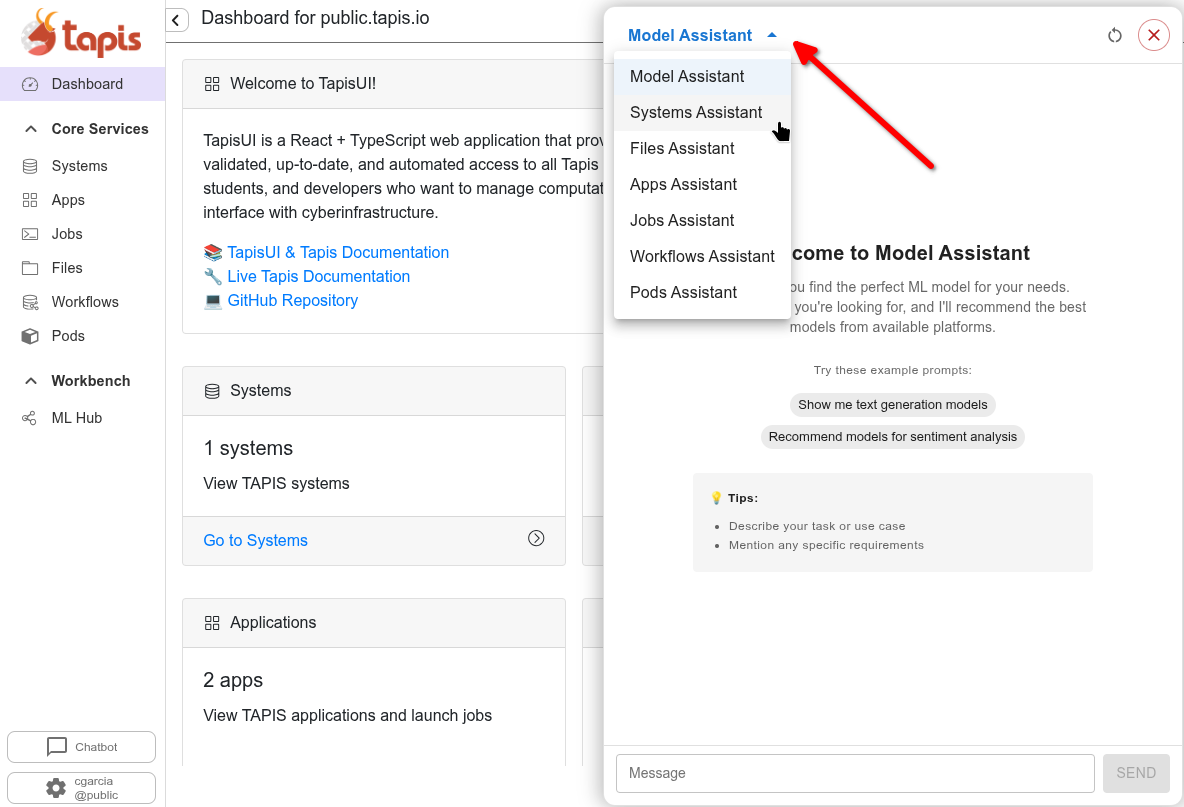
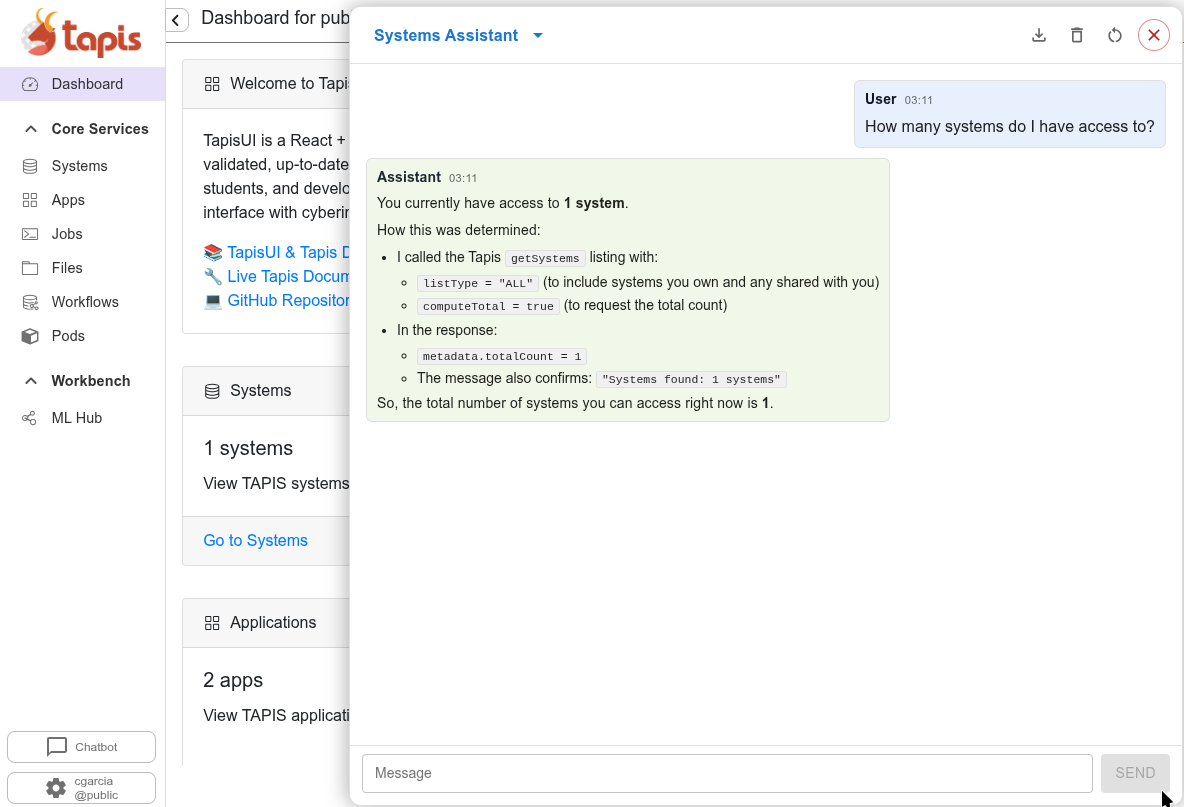
Currently the accessible assistants are research cases and only support text generation. The Systems Assistant however supports text generation and agentic calls via an MCP server. This agent allows users to prompt How many systems do I have access to?, the agent then makes calls to the Systems API on behalf of the user, returning actual API responses rather than purely generated text.
The Models Assistant is another MCP based agent, it makes backend calls to retrieve model information from Hugging Face and other platforms, returning the results and rationale as shown.

This image shows a user asking a question to the Systems Assistant and receiving a generic text response. At the top-right we once again highlight actions that a user can take along with the close chat button.
RAG (Retrieval-Augmented Generation)
The ChatBot supports RAG, which combines a language model with a knowledge retrieval system. This means the ChatBot can answer questions about Tapis documentation, your systems, applications, and jobs by retrieving relevant context before generating a response.
MCP (Model Context Protocol)
Some assistants leverage MCP to go beyond text generation and perform agentic tasks. MCP allows the ChatBot to execute actual Tapis API requests on behalf of the user — for example, querying the Systems service to list accessible systems or retrieving model metadata from Hugging Face. Rather than generating a purely text-based answer, MCP-backed agents make real backend calls and return live API responses, enabling users to interact with Tapis resources conversationally.
LiteLLM Backend
The ChatBot is powered by a LiteLLM backend, which provides a unified interface to multiple LLM providers. This allows the ChatBot to leverage different models while maintaining a consistent API. You can explore the ChatBot from the TapisUI interface to ask questions and get help with Tapis operations.
Service Deployment
The LiteLLM backend, MCP servers, RAG server, and backend Python API’s are deployable through the Tapis Pods Service. Providing a secure, easy to manage, collaborative interface for managing backend utilities.